This is a project that you really cannot do wrong. A stepping stones garden path can be as rustic or as clean lined as you like. Make it fit your location.
Stone Paths
Many of us may be able to find nice flat stones for our stepping stones garden path on our properties. Any stone with a nice flat top will do. Irregular shaped stones make for interesting patterned effects. More consistent shaped round or rectangular shapes will give us some geometric designs if placed regularly. 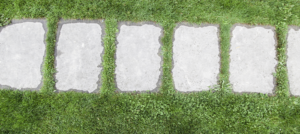
Most paths constructed with well-placed stones in either a random or more regimented consistent patterns will create useful paths that are nice to look at. For this post I am going to show how to place stones in different patterns and with different components around them to achieve a path that fits your taste.
A stepping stone path is a perfect fit in or around our gardens. They also are a great choice when we want to diminish a paths prominence in our landscape design.
Basic
The first path we look at will be a basic stone path with stones placed by simply removing enough earth to fit them into our desired locations. It is a good idea to not use stones that are too thin. Your stones should be at least 1 1/2 ” thick if possible. Thicker stones will stay in place better. They also will not break and split as easy as a thinner stone. You may want to get your self a helper when taking on these projects.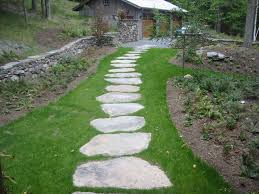
Place your stones out on top of the grass or ground, in the locations that look good to you. Once you have them in place walk on them to see if it feels natural to your gait. You may want to make little marks with spray paint on the grass before you start to mark a stone’s location for a comfortable gait or stride. Do this in four foot sections at a time, so as not to get too far ahead of yourself.
Once you have your stones placed how you would like them, mark around the outside of them with lime or marking paint and remove them from the spot. Now remove enough grass and earth to allow a base of about 1″ of sand and the stone. Mason sand will work fine for this project.
Set your stone in place and seat it a bit with a rubber mallet and some well-placed stomps. You will want the top of the stone to be a bit higher than the surrounding turf. It may be necessary to pick the stone up a few times to remove or add more sand to achieve the proper final height.
Regular shaped stones can be placed at regular intervals for a more ordered path appearance. Irregular shaped stones can be placed a bit more randomly for a more naturally appearing path.
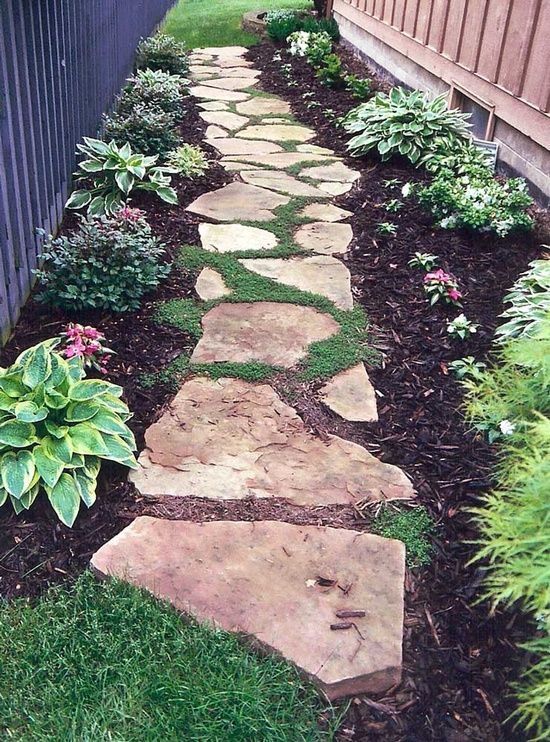
Continue placing and setting stones for the rest of the walkway, testing its feel for your stroll as you go. Placing stones in this fashion on a section of lawn, allowing and encouraging the grass to fill in the spaces between them makes a very inviting path.
Stepping Stones with plant fillers
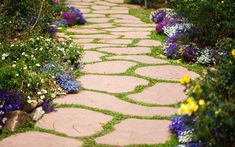
A way to create a little more natural but colorful path is to add plants to the spaces between your stepping stones. Creeping thyme is a good choice for this purpose.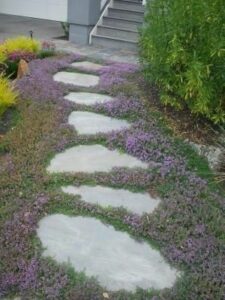
To incorporate this option into your path just set the stones as described above. After placing the stones remove a little earth from around them and add some amended soil, leaving enough room for your plant selection.
Stepping Stones with Fillers
This path will be a little more organized but still appear quite natural. This path will make use of gravel or river rocks around the stepping stones for contrast or color addition. The first step of this path will require you to remove some earth from the path’s location.
Lay out the paths two planned side edges with a garden hose in the desired configuration of your walk. Mark these two edges with marking paint and remove the hoses. Dig out about 3 to 4 inches of soil from between your marked edges. After removing the soil place your stones as described before in their planned positions.
Mark around the stones, one at a time and remove them. Place sand in the area of the removed stone and replace the stone, seating it with a rubber mallet. It may be necessary to pick up the stone a few more times to add or remove sand to get the stone to its proper height.
Check that the top of your path stone is a little higher than the surrounding turf by placing a straight edge 2 x 4 across it, long enough to extend out to the turf you want to be above. Are you planning on using a border stone or brick? If so, now is the time to install them. Follow the same procedure used for setting the stepping stones.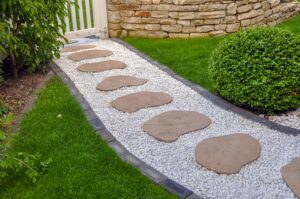
After finishing with the stone and borders place landscape fabric beside the border or edge and over the set stone between the two edges. Remove the fabric over the top of the stepping stones by cutting around the edges with a sharp knife. The fabric will help control weed growth up through your path.
Place crushed stone or river rock in the spaces around your set stone. You should use 3/4 inch stone or smaller for this purpose. River rock, with its smooth round surfaces, tend to roll around and move more. Keep this in mind.
Get Creative
Use your imagination. There are endless choices to use for borders and fillers. Sometimes less is more here. I, my self like the border less randomly placed stepping stone look. It does not detract from your surrounding gardens and flower displays. This path is perfect for winding through or by a garden feature.
So I hope you can take away some ideas for your path from this post. If you would like to leave comment or have a question please do so below.
Thank you for your post. It is a timely article for us. We started garden work and have been discussing the best stepping stones for our garden path. I think about doing some research on it, but never take time to do it.
Here comes your article, which contains all info I need. I like the stepping stones with plant fillers, since we have a small garden and would like to integrate the step stones into our garden plants and flowers.
Your description is all we need to setup our stepping stones, but it is hard for us to decide which plant will be added to the spaces between the step stones. We would like to have evergreen plants so that they could last long even in the winter.
Hi Anthony
Im glad you could find a little help from my post. Im not sure what area you live in, so I really cannot recommend an evergreen plant for you. Most online retailers could probably help you with this selection.
Thanks for these great designs on how we can make our garden and yard in general. I’ve eeem several houses around my place that do this and it always looks so pretty.
Now if we can’t find any stones laying around, where would you suggest we go buy them at? Also how much do you think each stone would cost?
The best place to start looking for stones to purchase is probably a local mason or landscape supplier. Usually they would be sold on a pallet, as a bulk purchase from 150.00 to 200.00 a pallet. Stop by and check though, because you never know what might be available locally.